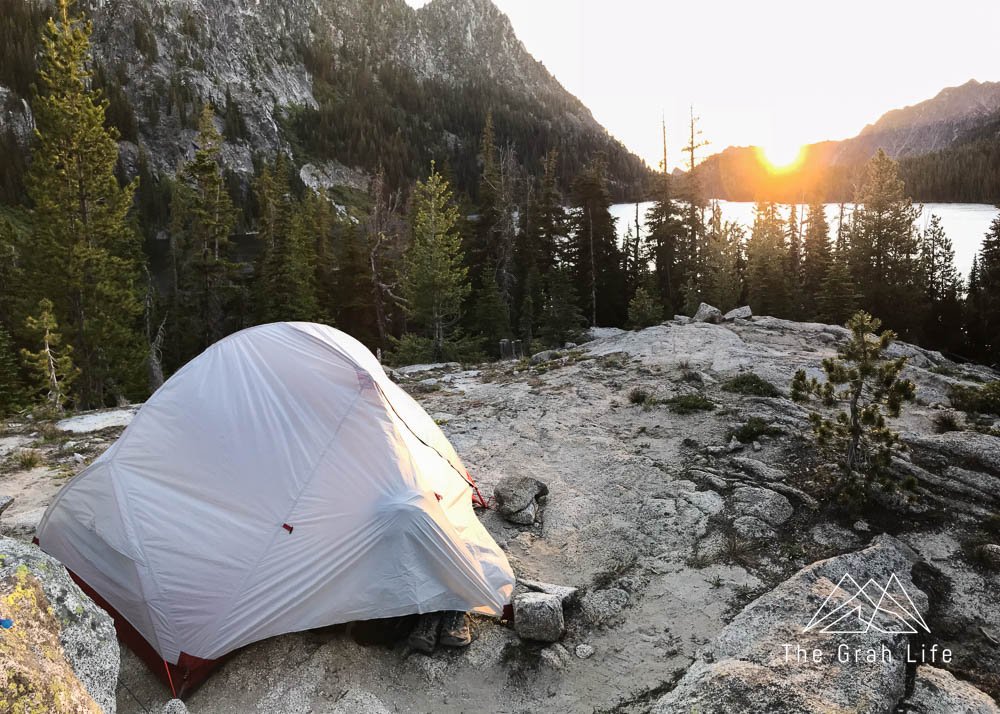
Beginner’s Guide to Backpacking in Washington
If you like camping and hiking, you’re going to LOVE backpacking!
We started backpacking in 2016 and remember how intimidating it was to begin. Figuring out routes, gear, campsites, and permits is a lot to handle — and that’s why we’ve created this blog. It’ll walk you through everything to consider, from how to choose a trail to pack weight and more.
Know a little about backpacking already? Click below to skip to a section.
What to do if you feel pain from wearing your backpack
Disclosure: We’ve included affiliate links with recommended hiking gear in this post. If you click through and buy something, we’ll receive a small portion of that sale. You won’t be charged more, and we haven’t been paid by any of these retailers to share their information. These are all our genuine preferences.

How to pack
Packing your bag well is crucial for your success. With items in their proper place and weight distributed evenly, you’ll have fewer pain points and easy access to things you may need.
Your backpacking bag has three zones: the bottom, core, and top, plus pockets and lash-on points. Here’s what to store in each:
Bottom
You’ll need to put your sleeping bag in a stuff sack (some bags come with them) and put it in the bottom compartment of your bag. The sleeping bag fills up our bottom compartments but if you have room to spare put other layers you plan to sleep in with it. This area should be full of lighter items.
Core
This is the middle section of your bag. Pack your heaviest items here first. They should be at the bottom of the core zone and closest to your back. This will include items like a bear vault or food bag, clothing (we pack ours in a compression bag), stove, and water reservoir.
Top
This is where you’ll store things that you may want or need on the trail, such as a first aid kit, raincoat, water filter, extra snacks, and toilet supplies. Extra layers are a great item to put here or at the top of the core zone in your bag.
Lash-on points
Most packs have a section to lash on long pieces of gear near the bottom of the pack. We clip on our tent and Therm-a-Rest sleep pads here.
Use carabiners to attach things like camp shoes, pee funnels, anything else that is large or might pop out of a pocket.

Side pockets
Fill your pockets last. You’ll want items like sunscreen and bug spray in them.
Hip pockets
We put our phones, snacks, salt pills, multi-tool, and Chapstick in these pockets. These are the most convenient pockets to reach while wearing your pack. If you have a need for an epi-pen or inhaler, this is where they should go as well.
Tightening your bag
When you’re done packing, tighten down every strap on the outside of your bag. This will help keep your gear in place and will greatly help your balance while wearing the bag.
How to adjust your bag
Packing your bag properly is just the first step to creating an enjoyable backpacking trip. Adjusting your bag correctly is the second step. Know that when a bag is packed and positioned properly, you should feel most of the weight on your hips.
Follow these steps to adjust your pack in order each time you put it on.
1. Hip belt
You’ll want your hip belt padding to be centered on your hip bones. Tighten these straps down so they are firmly against your hips.
2. Shoulder straps
These are the straps that hang near your arms. Grab them and pull them back until they stop moving easily.
3. Load adjusters
These are the straps on your shoulders. They pull the top of your pack forward, helping you balance and relieve stress off your neck. Lightly pull these two straps until they stop moving easily.
4. Sternum strap
This strap should be pulled taut against your chest, helping keep weight off your shoulders, but not tight enough that it restricts your breathing or is uncomfortable.
5. Taking your pack off
Take off your pack by loosening things in the opposite order you tightened them. Start by loosening and unbuckling your sternum strap, then loosen your load adjusters, shoulder straps, and finally loosen and unbuckle your hip belt.
When moving your bag, lift your pack from the handle at the top to prevent unnecessary wear on the shoulder straps.
Test it out
After you’re packed and adjusted, wear your bag, and walk around for at least ten minutes. You’ll find it will likely need adjusting and you may need to repack.
Expect to make backpack adjustments on the trail as well. Things usually shift after 20 minutes of walking, so know that it’s normal to need to do minor adjustments after starting your hike.
What to do if you feel pain from your wearing backpack
Packing and adjusting your bag takes practice, and it wasn’t until our fourth backpacking trip that we packed and adjusted our bags with ease. Here’s what to do if you feel hot points, tension, or pain:
Back shoulder pain
If you have shoulder pain in the back of your shoulders, your load lifters are too tight or your hip belt isn’t tight enough.
Front shoulder pain
If you have pain in the front of your shoulders, your shoulder straps are likely too tight or your hip belt isn’t tight enough.
Neck pain
If you’re experiencing tension or pain in your neck, your load adjusters are likely too loose. If this isn’t the case, the top of your bag could be too heavy, or not tightened down enough.
Pain to one side
If your bag is listing to one side or feels like it’s pulling in one direction, you need to readjust your packing. Distribute weight evenly in the core area and be sure you’ve packed your heaviest items as close to the bottom and backside of the core as possible.
Consistent shoulder pain
Meghann had shoulder pain throughout her first couple of backpacking trips no matter how she adjusted her bag. It turns out, she simply had too much weight. Some shoulder and hip strength training helped her go from being able to carry 28 pounds comfortably to 34.

This was our first backpacking trip and Meghann (on the right) had too much packed in the top of her bag. Pack as much as you can in the core of your bag and compress it tightly.
Bruising
It’s normal to have some bruising on your shoulders or hips after your first backpacking trip. These lessen the more you backpack.

Food storage
Storing your food and smelly items is essential in the backcountry. It’s well known that bears have a great sense of smell, and it’s important to keep your food out of their paws. However, you’re much more likely to be dealing with smaller thieves while backpacking. Mice, birds, and squirrels will be after your treats as well, so it’s imperative to put food away as soon as you’re done with it at camp.
What items to pack in your bear vault or food bag
Store any items that smell, including personal items like toothpaste, deodorant, sunscreen, and soaps, as well as garbage and uneaten food. Check your pockets and hip belts for wrappers and snacks you didn’t eat on the hike in. We’ve heard horror stories of hikers waking up to their backpacks being chewed through because they left a wrapper in a zipped pocket — don’t be that person!

Bear vaults
Some places, like the Olympic National Park, require bear vaults to be used. In places where this is required, ranger stations usually have some for rent if you don’t already own one. Since they are large and hard-sided, they make packing them difficult, but the benefit to having them is that you don’t have to rely on trees to hang your food.
At night, place your bear vault 100 feet from camp. Tuck it in a bush or between rocks if you can. You’ll want it somewhere where it cannot roll away easily, be tossed down a cliff, or into a river. We like the clear-sided bear vaults best so you can see what’s inside.
Hanging a food bag
Where a bear vault isn’t required, you can use a bag and rope to hang your food. However, this only works if you’re in an area with trees or bear wires set up. You’ll need to find a tree that your bag can hang 12 feet off the ground, six feet away from the trunk, and six feet below the branch, or two trees with the same specs that you can hang your bag between. You’ll want to find the spot to hang your bag before it gets dark, as it can be hard to find the right trees.
More on how to hang your bag here.

Check out our food bags hanging in the background of this photo. This was the best tree we could find for it, but a bear vault would have been better in this scenario since the trees weren’t ideal.
Food vaults
Trails that are more popular or have more frequent bear encounters sometimes have food vaults or bear wire at designated campsites. This will be shared in the campsite descriptions, and since they are available on a first-come, first-served basis and aren’t always up to date, we recommend bringing a bear bag and cord to hang your food as a backup option.

What to eat
We prefer to meal prep as little as possible, so we opt to eat prepackaged dehydrated meals. We usually pack a dinner and breakfast for each day that we’re gone, as well as plenty of snacks to eat between. You should also pack an extra day’s worth of food as well just in case of an emergency.
Dehydrated meals usually come in one or two package servings. For reference, Zach usually eats two servings for his meals and Meghann eats one and a half. On our last backpacking trip, we opted to split two serving meals, supplemented with tortillas, snacks, and dehydrated desserts rather than have unwanted leftovers.
You’ll also notice that we really love the Peak Refuel brand. They’re by far the tastiest dehydrated meals we’ve ever had. Plus, they have allergens (like gluten) marked well and have less sodium and cholesterol than other brands. The Chicken Coconut Curry is by far the best-tasting meal we’ve ever had on the trail.

One day of food on the trail for us usually looks like this:
Breakfast: Peak Refuel Breakfast Skillet split between us, on tortillas (gluten-free)
Lunch: Snacks like Lara or Clif bars, dried fruit, crackers and pepperoni, coconut rolls, and beef sticks.
If you’ll be day hiking or moving to another campsite, snacking often is essential to keeping your energy level steady. Plan to eat a snack every one to two hours.
Dinner: Peak Refuel Chicken Coconut Curry split for dinner (gluten-free)
Dessert: Backpacker’s Pantry Crème Brûlée split for dessert (gluten-free)
Parking passes
Most trails in Washington require you to hang a parking pass on your windshield. There are three different passes you may need and some they overlap in coverage. Each vehicle that you have parked at a trailhead will need the required pass. Most trailheads don’t have places to purchase passes, so get them beforehand at your local REI, ranger station, or online.
Discover Pass
The Discover Pass covers all of Washington’s state parks. They’re $12 for a day pass or $35 for the annual pass. This is the only pass that covers state parks.
America the Beautiful Pass
This pass covers parking in all U.S. national parks, but also national forest land in Oregon and Washington as well. This is the pass we use most often because it covers such a broad range of areas. It costs $80 for an annual pass.
You can also buy national park passes specific to the national park you’ll be visiting. This costs $30 for a seven-day pass or $55 for an annual pass, per park. These passes don’t provide national forest coverage.
National Forest Pass
The National Forest Pass is $10 for a day pass or $30 for the annual pass. They’re valid in Washington and Oregon and are required for so many hikes. If you plan on buying an America the Beautiful Pass, it covers national forest land too, so you don’t need both.
Backpacking permits
Permits are required for backpacking certain trails and campsites. You can reserve them in advance online at recreation.gov, or at ranger stations. They usually go on sale in March, and popular sites can sell out. Some sites do have a portion of permits reserved for walk-up reservations at ranger stations, but if you can, reserve your permit as soon as you have where you’d like to backpack.
Typically, group sizes on trails are limited to 12 people. If you’ll be with more than 12, you’ll have to split up, hike in, and camp at least one mile apart.
Check out this blog for information on all of Washington’s permitted backpacking sites.

The 7 Leave no trace principles
1. Plan ahead and prepare
If you’re reading this, you’re doing a great job already! However, you should still seek up-to-date information about whatever campsites and trails you’re considering.
Look at recent trip reports on Washington Trails Association and Alltrails, and if you still have questions, ask us for more information in the comments here or in the Washington Hikers and Climbers or PNW Outdoor Women Facebook groups.
2. Travel and camp on durable surfaces
This means you shouldn’t be cutting switchbacks (it erodes the trail) or pitching your tent in meadows or next to a lake (you should camp 200 feet from water sources unless designated campsites exist). Stay on trails and find a preexisting campsite to make camp at. If you’ll be backpacking in a popular location, arrive early to ensure getting a site or start your trip on a weekday.

Some campsites have shelters, like this one.
3. Dispose of waste properly
Many of the locations we suggest have pit toilets near the campsites. Use these as much as possible, but if there isn’t one nearby, dig a cathole 6-8 inches deep and at least 200 steps away from water sources for solid waste. Always pack out your toilet paper.
There are some locations that require you to pack out your solid waste due to sensitive environments. In these cases, use a wag bag.
4. Leave what you find
Keep in mind that good campsites are found and not made, and if you do move twigs or rocks to neaten up your site, move them back before leaving.

This is what a large campsite can look like.
5. Minimize campfire impacts
Always check this map or call a nearby ranger station to check on the fire danger for the area you’re planning on camping in. If there is a burn ban in place, the only fire you’ll be able to have are from packable propane stoves.
When camping in areas where campfires are allowed, use existing fire rings, and only burn wood from the area when it’s permitted and in abundance. Allow the wood to completely burn to ash, put it out with water, and extinguish it completely.
6. Respect wildlife
Always keep your distance from wildlife. Only bring pets on trails that allow them and always keep them on leash. Pack food away when you’re not eating — you’ll be surprised at how bold and quick some animals are in popular areas!
7. Be considerate of others
Yield to uphill hikers, horses, and stock. Pull over if there are faster hikers or trail runners behind you. Keep your music off the trail, unless solo hiking in bear country.

Safety tips
Aside from bringing first aid, a map, and a personal locator beacon (like a Garmin inReach satellite device), you should always tell someone your plans and leave a printout of your itinerary under your car seat.
Your contact person should know where you plan on hiking and your intended route. Let them know when to expect you to return and contact them to let them know when you’re back. In addition, let them know who they’d need to contact if you’re not back by the appointed time (typically it’s the local authorities).
Bring at least one bright item of clothing, as well as a small mirror, as a means of signaling aircraft if you do need help.
Wildfire safety
Wildfires can start at anytime. Knowing what to look for and how to get up-to-date information when you’re out on the trail is important. Check out our blog on how to hike safely during wildfire season here.

Beginner backpacking tips
Practice using and setting up the following items:
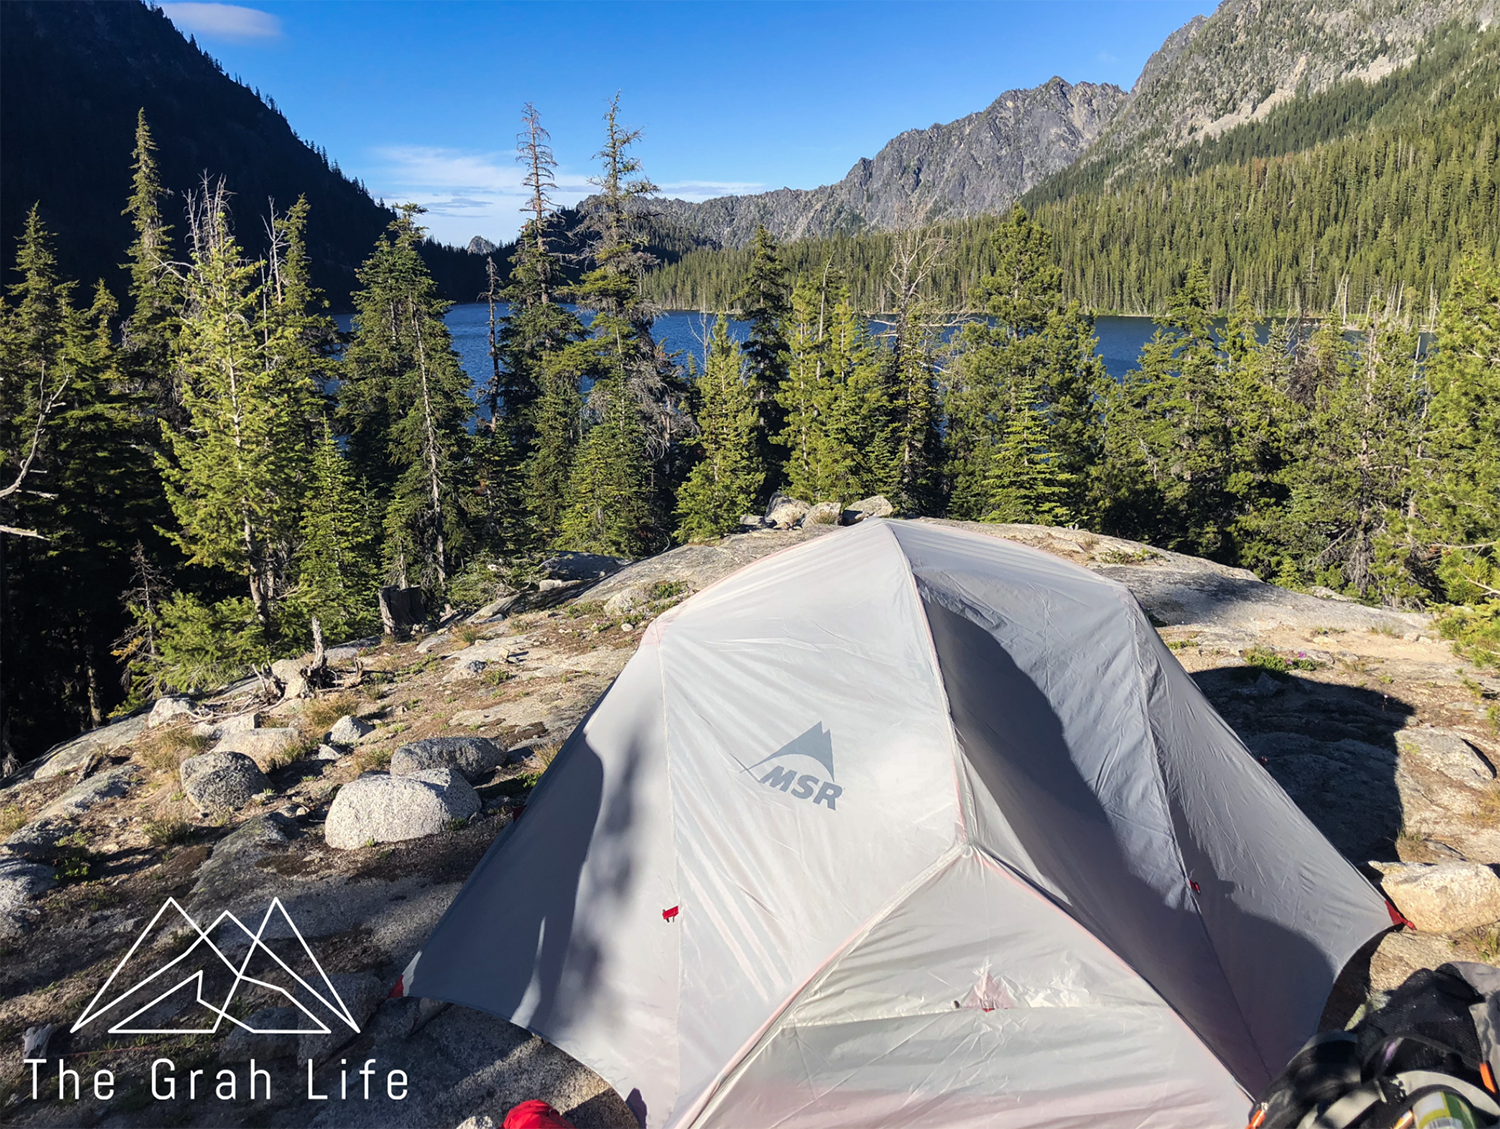
Setting up your tent
If you haven’t used your tent in a while check to see if the shock cord in your poles still has resistance left in them. We didn’t do this on the backpacking trip shown below and had to jerry-rig our tent together.
After our trip, we replaced the shock cord in the poles at home and were surprised at how easy and cheap it was.
Don’t be surprised if there is water in your tent in the morning — it’s likely condensation.
To prevent this ventilate your tent as much as possible and don’t let your belongings touch the edge of the tent to help keep them dry.
Setting up and igniting your cook stove
Test out your water filter
Test out your personal locator beacon
Lakes tend to be buggy from July through August — plan ahead and bring bug spray, spray your clothing gear with permethrin, and try to camp in a breezy spot.
Pack your gear ahead of time and wear it for a while to see how it needs to be adjusted.
When you get to camp, set up your tent and find a spot to hang food or store your bear vault before it gets dark.

How to choose a trail
For your first backpacking trip, you’re going to want to choose an easy trail. Specifically, a trail with low mileage or a trail with multiple campsites along the way (choosing a campsite spontaneously only works if you don’t need permits for specific campsites) and low elevation gain.
Now, you might be thinking like Meghann and say “Oh, but I usually hike 8+ miles on weekends, a moderate-to-hard trail would be more fun”. This is where you’re wrong.
Backpacking is significantly harder than day hiking since you’ll be carrying so much more weight. It makes a trail that’s rated easy feel like a moderate, and moderate feel hard. Plus, if you need to bail for whatever reason, it’s not impossible to do so on a shorter trail. Better to ease into backpacking and have a relaxed enjoyable trip, than a frustrating experience.
Finally, you’ll also want to camp near a water source. You’ll be filtering water for meals and drinking, so being near moving water is best. Ideally, you’ll want to camp close enough to your water source that it’s not a huge hassle to reach while still camping at least 200 feet away from water sources.
Check out this blog to read about our favorite beginner backpacking trails in Washington.

Gear recommendations
Hiking gear
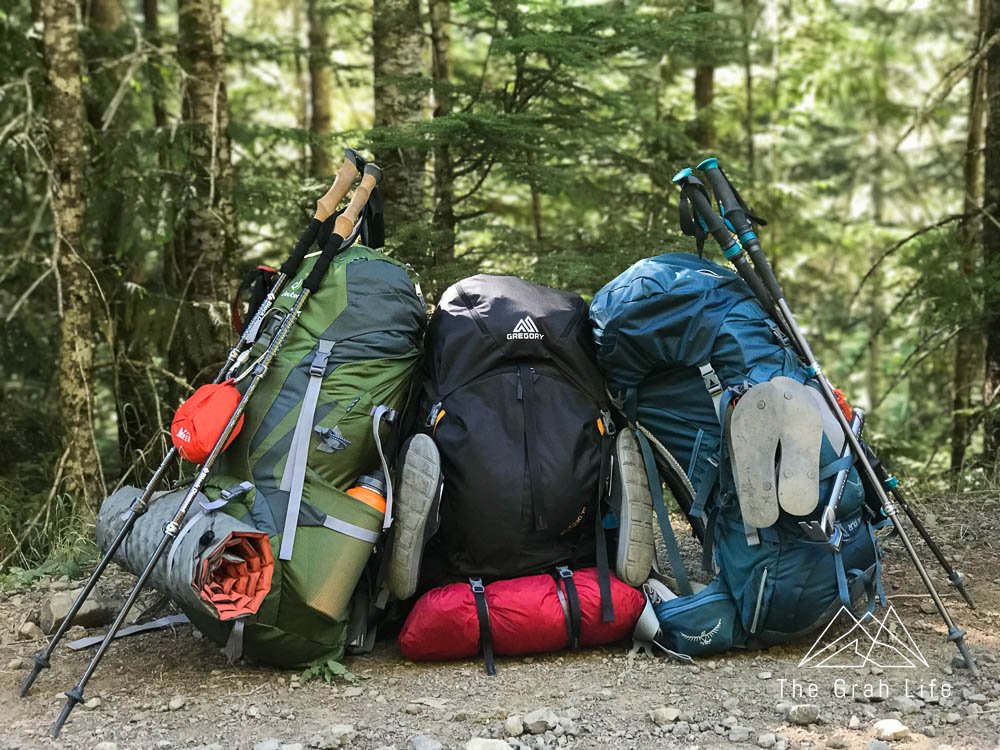
Backpacking backpacks
Zach has Baltoro 75L bag
Meghann has the Osprey Ariel 65L
The larger your bag, the more items you’ll want to bring, so resist the urge to pack your bag full.
We highly recommend trying on packs at REI. They’ll help you load them with weight, teach you how to adjust the bag, and find the appropriate size for your torso.
Rain cover for your backpack
Some packs have this built-in, so make sure yours doesn’t before you make an unnecessary purchase.
A plastic poncho or garbage sack works in a pinch.
These help keep your balance and keep weight off your knees, which is especially helpful while backpacking, and hiking, downhill.
Sleeping
Backpacking tents are small, and there likely won’t be enough room inside for you and your backpack. Fit your backpack in the vestibule (the space between the tent and the rainfly) instead.
This protects the bottom of your tent, especially when you’re on granite or other hard surfaces. It’s a must for us!
Having a gear shed is a luxury and storing gear in your tents vestibules works just fine, but we love bringing this with us on rainier trips!

The Hubba Hubba with the gear shed
You can find a rock to hammer in tent stakes, but we prefer using a lightweight hammer.
Sleeping bag
The bags we have are no longer being sold, but these are the ones we’d get if we had to make another purchase (men’s/women’s)
Pay attention to the size of bags before buying — if you’re taller, opt for a bag that comes in a long size.
If your bag doesn’t come with a stuff sack to transport it in while backpacking, you’ll need to buy one — trying to stuff it in your backpack without one is impossible.
Sleeping bags aren’t unisex — women’s bags tend to have more room for hips, with more down filling in areas like the foot box where women generally feel colder than men.
Sleeping pad
These aren’t just to keep you comfortable while sleeping on the ground – they’ll help keep you warm, too.
The R-Value tells you how insulated a sleeping pad is. The scale ranges from 1.5 to 7. We recommend getting one with a rating between 3 and 5 so you’ll sleep comfortably between spring and fall (the higher the number, the more insulated it is).
We love how comfortable blow-up and self-inflating sleeping pads are, but they weigh a bit more.
For harder trips, we bring lighter (and less comfortable) Therm-a-Rest Z Lite sleeping pads. They’re great to pull out of your tent to use as a seat at camp as well.
Camp kitchen
Bear vault or food hang bag and 50’ nylon cord
More on this above.
Jetboil
This Jetboil makes heating water so easy.
It has an igniter built in and comes with a pot to heat water, a lid/strainer, and a measuring cup/bowl.
There is a heat indicator on the side that begins to turn orange when it starts to get hot. The more orange you see, the hotter it is, making it easy to heat water to an appropriate temperature for hot cocoa, coffee, or a meal (pictured below).
Add this French press to your kit if you’re a coffee drinker!
The MSR Pocket Rocket Stove Kit offers a cheaper cooking solution.
This one does not have a built-in igniter, so you’ll need to bring a lighter with you.
Propane
Many backpackers prefer using these smaller fuel canisters, however, we’ve only found them online and at REI.
These canisters are easier to find, slightly larger, and only weigh 0.4 ounces more, so on easy trips, we usually take one of these and they last for multiple days.
We leave this out on hard trips (we aren’t coffee drinkers) but it’s a necessity for some!
Utensils
We love these long sporks — they’re perfect for reaching the bottom of rehydrated meal bags.
Make sure to always wash dishes 200 feet from water sources!
These are handy for drying dishes.
Sponge or dish scrubber

Food
If you use prepackaged dehydrated meals, you won’t need any dishes to cook in (aside from the pot that comes with your Jetboil or Pocket Rocket kit).
This makes washing dishes extra easy — leave out your pot of water to dry and all you’ll need to clean is your silverware.
Extra days’ supply of food.
Salt pills (caffeinated/noncaffeinated)
More on what we eat above.
Water
We have two filters:
The first is the MSR MiniWorks EX Backcountry Water Filter
It weighs a pound.
Filters 1 liter per minute.
The filter will last a very long time before needing to be replaced.
It filters the most amount of contaminants out of water of all filters.
The downside is that you have to manually pump the water through the filter — this gets tiring and it takes a while.
It’s easiest to use when attached to a Nalgene bottle. Fill the bottle, dump the filtered water in your larger water reservoir, and repeat.
Easy to keep clean at camp and clean up for storage after you get home.
Meghann prefers the Platypus Gravity Water Filter
It weighs 11.5 ounces.
Filters 1.75 liters per minute.
Filters slightly fewer contaminants from water than the MSR filter above.
The filter will wear out and need to be replaced sooner than the MSR filter.
Backflushing this filter is extremely important. Get the air out of the filter during each use, or it will filter water slower over time. If this happens, whack the filter against something to release air until it filters at regular speeds again.
All you have to do is fill the dirty water bag with water and place it above or uphill from the filter and clean water bag — no manual labor and minimal time required!
The dirty water bag provides a great container to gather and dump water onto campfires without contaminating your drinking water vessels.
Easy to keep clean at camp and clean up for storage after you get home.
Over the years we’ve tried Osprey, Platypus, and Hydrapak water bladders. The Hydrapak design is best!
They’re made of tough material so we’re not worried about them leaking or breaking, and they can be flipped inside out to clean and dry.
A water bottle is nice to have around camp, but unnecessary.

The gravity filter in action
The ten essentials
Map of the area you’ll be hiking in
When we got serious about backpacking, we invested in this personal locator beacon. It gives us peace of mind with the ability to set waypoints, text others when there is no cell service, and use the S.O.S button for emergencies.
There is a $14.95 monthly subscription fee
Remember to bring backup batteries.
Neutrogena Ultra Sheer Sunscreen
This sunscreen has the safest product rating for sunscreen on the EWG’s Skin Deep guide.
We recommend slipping a few of these in your bag throughout wildfire season.
Optional gear
We have two of these: one to pack our clothing in and one for food if we’re not using a bear vault.
One for clothing which doubles as a pillow.
These are nice to have if it’s cold or dusty.
Gaiters
Meghann wears these lightweight gaiters year-round — they help keep pine needles out of your boots!

Use these to attach things to your pack – including flip flops or other camp shoes!
Day pack
If you’ll be day hiking but don’t want to carry your large pack, take a packable day pack with you. Some backpacking bags, like the Gregory Baltoro, have these built in!
Parking passes
Permits
Check out this blog for information on backpacking permits in Washington.
Clothing
Again we recommend going to REI to get fitted for boots. Their employees are well-versed in the sizing trends of each brand and can help you choose boots according to your needs.
Check out this article if you can’t visit an REI in person.
Bonus: REI members can return products that they don’t end up liking within a year of purchase, regardless of use.
Good boots should not need to be “worn in”, although we do advise trying out new boots before backpacking with them.
If you’re getting blisters from your boots, try tying your laces differently.
These wool undergarments are odor resistant and temperature regulating.
Choose longer briefs to help prevent chafing.
This Smartwool bra is odor resistant and temperature regulating.
Choose to wear a bra with minimal/flat straps — bras with hefty straps dig into Meghann’s back with the backpack on for long periods of time.
Base layer bottoms (men’s/womne’s)
You’ll want to have extra layers for the twilight hours — it gets chilly.
Base layer tops (men’s/women’s)
Moisture-wicking T-shirt (men’s/women’s)
Moisture-wicking pants (men’s/women’s) or shorts (men’s/womene’s)
We tend to backpack more in pants than shorts because they protect your legs from the sun, dirt, and ticks.
If you’ll be crossing streams and rivers, then you’ll want shorts.
We love bottoms with stretchy waistbands for backpacking — they’re so much easier to move in.
Stay away from hiking pants with built in belts — they’ll be uncomfortable with a backpack and don’t stay tight.
Camp shoes
Having camp shoes gives your feet time to breathe after a hard day of hiking. Choose the type of camp shoe based on the activities you’re going to be doing.
Chacos (men’s/women’s) work great for water crossings and trips where you want sturdier sandals. The downside is they are heavier.
Xeros (men’s/women’s) are similar to Chacos, but are lighter with less arch support.
Crocs are lightweight and protect your toes.
Flip flops (men’s/women’s) are the most lightweight option but offer the least protection.

We wore Chacos when day hiking at Havasupai Falls.

Hygiene supplies
Toilet paper or a Kula Cloth
Gallon Ziploc bags for garbage
This is a game-changer for the women/trans/non-binary folk!! It allows you to go pee standing up. Since you only have to unzip and point the direction you want to let things flow, it’s so much more private than pulling down your pants and squatting.
It feels amazing to be able to wipe off grime before getting into your sleeping bag but rivers work well for this too.
Either use a wipe or face wash to clean your face each night.
Prevents chafing
Travel size deodorant (men’s/women’s)
Travel-size toothpaste and toothbrush
Personal medications
Things we’ve added to our emergency kit over the years
These are great to have in case your water filter breaks.
These will help hold a snapped tent pole together.
Some people wrap a bit of duct tape around their trekking poles, but we prefer to keep a tiny role in our emergency kit.
Zip ties are especially helpful when snowshoeing — they can hold together broken snowshoes. We have yet to find a use for them on the trail otherwise.
We carry a Sharpie with us in case of snake and tick bites. In the event of a bite, circle the border of the swelling and write down the time to help emergency personnel assess the severity of your bite.
Renting gear
If you’re not ready to purchase gear, or would rather test things out first, consider renting. Back 40 Outfitters is a family-owned, Seattle-based business that rents out all kinds of camping kits in Washington. For backpacking, you can choose between kits made for 1 to 4 people, or if you’d rather build your own kit a la carte, rent from REI.
What to do at camp
On our first backpacking trip, we wondered what we’d do with all the extra time on the day between hiking in and out of camp. What should you expect and what should you bring for entertainment?
What to expect
The day you arrive at camp, you’ll be setting up your campsite. This means putting your tent up, organizing your sleeping bag, clothing, finding a spot to store or hang your food, and cooking dinner. This can take a good amount of time, so you likely won’t have tons of downtime before you feel like crashing for the night.
It’s also common to go to bed earlier while backpacking than you would on a car camping trip. You’ll be tired from your hike in, and you’ll be waking up early when it gets light out, so don’t expect to need entertainment late into the night.
If you’ll have free days between moving campsites or packing up, check out what day hikes are nearby. Often, you’ll be near amazing views that may not be easy to reach without camping nearby.

Luxury items
Aside from hiking, you can also read a book, hammock, play cards, journal, watch for wildlife with a monocular, swim, or have a fire (only in designated areas where there isn’t a fire ban). Meghann’s parents bring cards and a lightweight packable cribbage board!

Playing cribbage at camp
On trips we have days without hiking planned, we usually choose one or two of these non-essentials each and have a deck of cards in our pack if the forecast is stormy. Essentially, you will easily find ways to fill your time with walks near camp, day hikes, and lounging about.
Zach’s all-time favorite luxury item he brought on a trip was a bacon-shaped float that he used on Lake Stuart in the Enchantments!


Search the blog for more adventures! Try searching for topics such as “hiking”, “road trip”, or “Washington”.